Our materials are really easy to use and quick to organize.
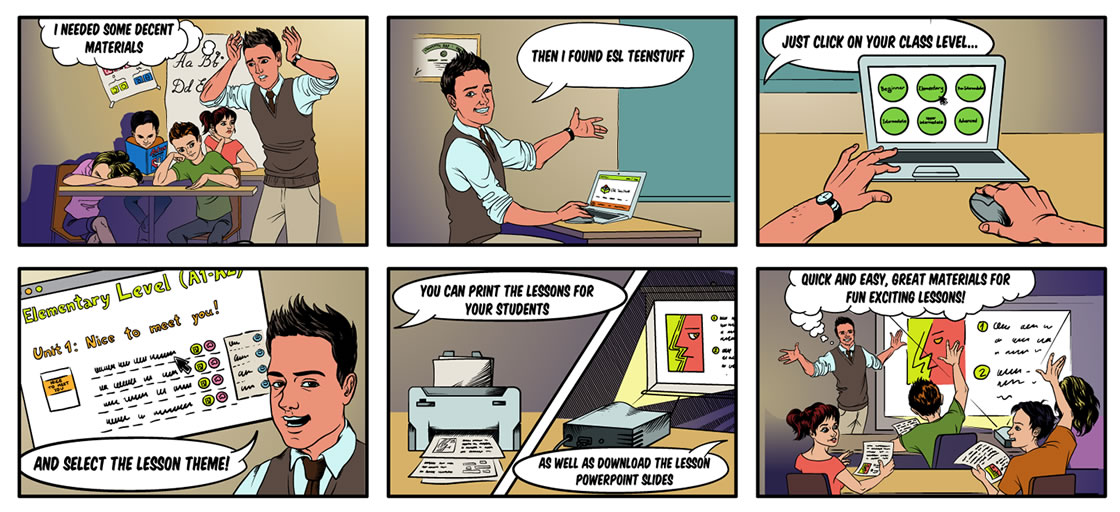
Below is a simple step-by-step explanation. At the bottom of this page you can find download links to more detailed explanations.
Contents:
- Quick Start Guide
- 1. Using the PDF lessons and PowerPoint slides
- 2. Lesson organization
- 3. Task lessons (Lessons A and C in each unit)
- 3.1 A task lesson walk-through
- 4. Additional lessons (Lessons B and D in each unit)
- 4.1 An additional lesson walk-through
- 5. Supplementary materials
- 5.1 Supplementary material walk-through
- 6. Conclusion
- 7. Resource downloads
Quick Start Guide »
1. Select your lesson level.
Click on the level of your class from the menu under “Lessons”:

For an explanation of the levels, please click here.
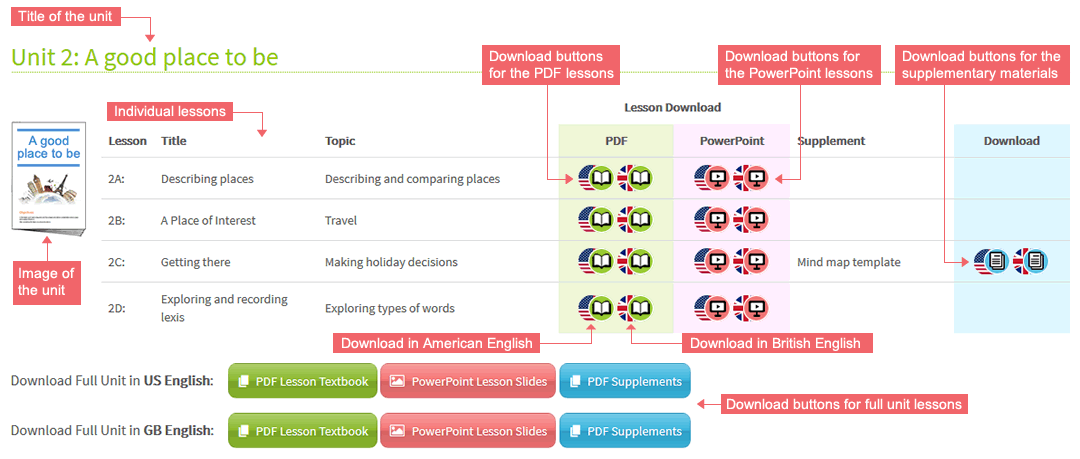
2. Select your lesson and download the materials.
On the lessons page you will see a list of lessons organized by unit. You can choose to follow the lessons in the order on the page or you can ‘dive in‘ and select any lesson you want.
You have the following options to download a lesson:
- download a “textbook” style lesson as a PDF file. You can print this out and give to your students. Download by clicking on
 (US English) or
  (GB English).
 - download a PowerPoint slide lesson. You can use with a projector or on a PC screen in your lesson. Download by clicking on
 (US English) or
  (GB English).
 - download and use both the PDF and PowerPoint lessons together. Your students have the PDF lesson print outs and the teacher uses a projector.
- download PDF supplementary materials. These optional materials can be printed off and used to enhance your lesson. Download by clicking on
 .
.
You can download a single lesson or a full unit. All lessons are available in American English and British English.
3. No need to plan!
Just read through the materials before you teach. The lessons are self-explanatory and easy to use.
4. Teach your lesson.
Our lessons are full of useful language and enjoyable tasks. Our lesson textbooks will guide you and the class through each lesson and provide lots of practice in all of the essential skills of English.
1. Using the PDF lessons and PowerPoint slides
Our lesson textbooks are available in two versions: the PDF lessons textbooks and PowerPoint lesson slides. You can use them in the following ways:
PDF lessons textbooks: download, print and hand out to your students. Use them in class as your textbook – both students and teacher use them.

PowerPoint lessons slides: download and show in class either projected onto a screen (or whiteboard) or on a PC screen. Use this in class as your textbook – teacher shows the slides and students follow.

Both PDF lessons textbooks and PowerPoint lessons slides: use together in class – the teacher displays the lesson via a projector or PC screen and students follow with their PDF text printouts.

2. Lesson organization
Lessons are organized into theme-based units. Each unit contains 4 theme-related lessons (click here for an image of the unit structure).
Within the group of 4 lessons, two lessons are task lessons and the other two are additional lessons (each lesson 60-90 minutes +).
Below is an example of a unit with its four lessons:
| Unit | Lessons | Pages / Slides | Timing | Supplement |
| 3 | 1A Task Lesson | 5-8 | 60-90 minutes + | Optional |
| 1B Task Lesson | 5-8 | 60-90 minutes + | Optional | |
| 2A Additional Lesson | 5-8 | 60-90 minutes + | Optional | |
| 2B Additional Lesson | 5-8 | 60-90 minutes + | Optional | |
| 3A Task Lesson | 5-8 | 60-90 minutes + | Optional | |
| 3B Task Lesson | 5-8 | 60-90 minutes + | Optional | |
| 4A Additional Lesson | 5-8 | 60-90 minutes + | Optional | |
| 4B Additional Lesson | 5-8 | 60-90 minutes + | Optional |
Therefore, if you are following the flow of our lessons you would teach the unit as follows:

- The focus of Lessons A and C is a task, with other activities leading up to the task or following the task.
- The focus of Lessons B and D is on extended topics with activities concentrating on the skills of reading, writing and speaking.
3. Task lessons (Lessons 1 and 3 in each unit)
Each task lesson has the following sections.
3.1 A task lesson walk-through
In the explanation of the materials below, we will show both the PDF materials and PowerPoint slides side-by-side. Whether you use just one version of the texts or both together, you can follow the instructions below in the same way.
We will use the two-part lessons “Describing Places” and “Tourism” in this example, which is a Pre-Intermediate level (A2 – B1) lesson, Unit 2, lessons 1A and 1B. The procedure explained below can be applied to any task lesson for all levels.
- download lesson here:
Lesson 1A (American English version)
Lesson 1A (British English version)
Lesson 1B (American English version)
Lesson 1B (British English version)
You are free to use the materials in any way that you wish. For each step we provide our recommendation on usage.
STEP 1 – Lesson A: Title and lead in (suggested strongly)
You might use the title and/or photographs shown below to speculate about what the topic area might be for the lesson. Here, this is places/travel. You could, for example, elicit some vocabulary items from the picture on the subtopics buildings, means of transport, geographical features etc. or ask the students to tell you what they know about the places shown.

STEP 2 – Lesson A: Overview and objectives (suggested strongly)
This is an outline of what the learners should be able to do by the end of the lesson framed as ‘can do’ statements. Make sure the learners understand the content of the objectives you choose to use. At the bottom of the PDF page are a set of 4 photographs lifted from the pages of the lesson. These can be used for additional speculation as well as for eliciting key lesson vocabulary.

STEP 3 – Lesson A: Language Review (optional)
This page recycles language and issues from the previous lesson and therefore only needs be used if you are following the order that our lessons are presented in.

 There are usually two or more distinct activities in Language Review sections, the idea being that you should choose what is more appropriate for you and/or use your own ideas and items you have noted from previous lessons.
For example, the activity shown on the left could be used in isolation and the others on the page dropped or modified substantially.
STEP 4 – Lesson A: Before you start (suggested)
This page builds on the work you did at the beginning of the lesson (speculating and eliciting vocabulary on the title page) with two or more activities.
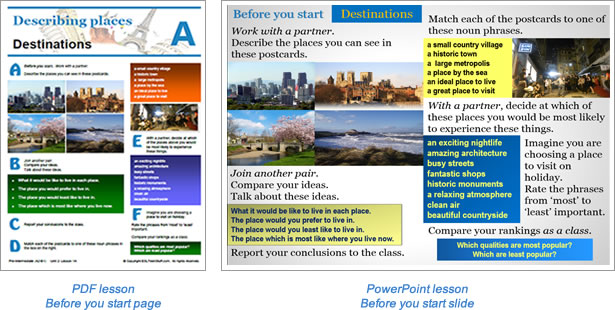
An example of activity in this sections is as follows:

In Exercise A, the instruction ‘Work with a partner‘ is shown in italics and all classroom interaction instructions are given in italics. In this case, pairs work together to describe the places in the pictures.
Such instructions are suggestions only, but the aim is to promote interaction between students. With a weaker class you could form larger groups, or with stronger students, give pairs two photos each, or give them varied time limits. If in doubt, we advise that you follow the instructions as given.
In Exercise B, the class management instruction ‘Join another pair‘ is again given in italics (i.e. students are now in groups of four) and all class management instructions are given in italics. Again, this is a suggestion, but one which would promote interaction between students.
Prompts (also Exercise B) which students work from are usually given in boxes, speech bubbles or short texts. The bullet-pointed ideas in the green box are an example of this.
The next step (Exercise C) is to move towards a class round up. This activity could easily stop here. However, an option has been given to extend this with explicit focus on a language point in Exercise D.
STEP 5 – Lesson A: Task preparation (essential)
If you are restricted by time, you could eliminate the previous steps and start your lesson here.

In Exercise C below, prompts are given in the box. Check that the students are clear about what they have to do and understand content words/phrases such as ‘geographical features’, etc. Elicit examples.

Examples and models are often given in speech bubbles, as shown in Exercise D above.
STEP 6 – Lesson A: Lesson summary and self-study suggestions (suggested)
Lesson objectives are re-visited, suggestions for self-study (homework) are given and the lesson rounded up.

STEP 7 – Lesson B: Task (essential)
The new lesson (Lesson 1B) continues on from lesson 1A. Everything done so far (except the Language review) can be seen as preparatory to the task.
The task is clearly shown in the title of the PDF page or PP slide.

Task instructions are often given accompanied by a short text (below-left) which develops the context and gives a reason, and a goal, for the completion of the task. Spend some time on this. This will be followed by further instructions and prompts designed to provide scaffolding for the learners when they do the task.

Prompts are given in Exercise B (above-center) to aid students in their discussions.
Models of a finished product (above-right), or a solution to a problem, are sometimes provided, again especially useful for students who are at a lower level of proficiency. You will need to have these covered/hidden during the tasks themselves.
The idea behind these tasks is for you and your students to find ‘gaps’ in their knowledge and skills while using language in real time. For this reason, monitoring them, and their output, closely is key. Structured feedback has been included in the lessons as the next phase of the lesson.
STEP 8 – Lesson B: Task feedback (essential)
In these resources, learners either give feedback on their own performance as an individual or as a member of a group. Alternatively, feedback can be given by a partner, other members of their group, or from the class as a whole. Full guidance is given on the page or slide devoted to this important phase of any lesson.

In the example, student-produced leaflets are displayed and classmates are asked to assess these using the criteria shown below. They then discuss and compare ideas as a class. In general, criteria used for student-student feedback are based on relative success in solving the communication problem enshrined in the task, as well as fluent and/or accurate language use in trying to solve it in real time.
You may choose to intervene at this stage and provide positive and negative feedback on issues raised.
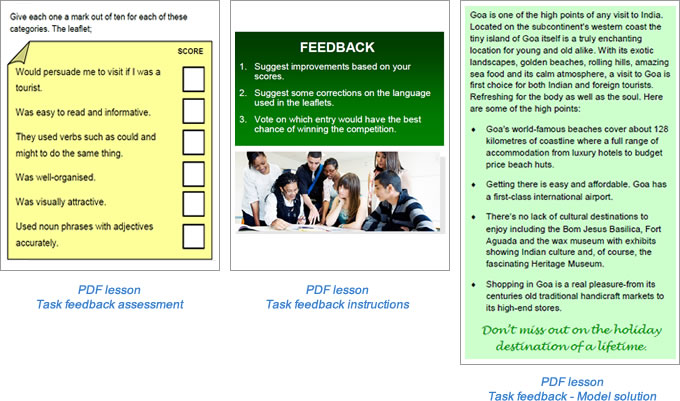
Model solutions to problems (as shown above) are provided in some lessons.
STEP 9 – Lesson B: Task follow on (suggested)
This section includes additional work which is thematically linked to the task.

This example shows an About Language lesson insert (shown below). Learners are asked to read some basic information about a key feature of the target language, in this case, various commonly-used phrase types. The aim is to develop student noticing skills which learners can use in texts they encounter in class and elsewhere.

The students now move on the focus on one example language pattern (adjective + noun) in Exercise B above, and are given some examples of this from earlier in the lesson.
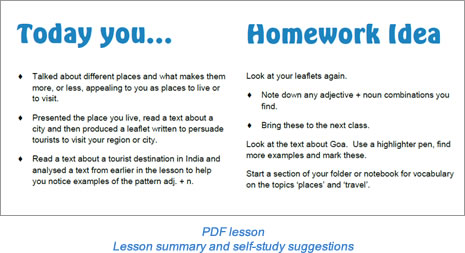
STEP 10 – Lesson B: Lesson summary and self-study suggestions (suggested)
Lesson objectives are re-visited, suggestions for self-study (homework) are given and the lesson rounded up.
4. Additional lessons (Lessons 2 and 4 in each unit)
Each additional lesson has the following sections.

The additional lessons contrast with the task lessons (A and C) in that they are less focused on tasks and contain extended topics and language focused themes. The additional lesson activities support the task lessons by concentrating on the skills of reading, writing and speaking, as well as development as learners.
4.1 An additional lesson walk-through
We will use the two-part lessons “A place of interest” and “Travel and journeys” in this example, which is a Pre-Intermediate level (A2 – B1) lesson, Unit 2, lessons 2A and 2B. The procedure explained below can be applied to any additional lesson for all levels.
- download lesson here:
Lesson 2A (American English version)
Lesson 2A (British English version)
Lesson 2B (American English version)
Lesson 2B (British English version)
You are free to use the materials in any way that you wish. For each step we provide our recommendation on usage.
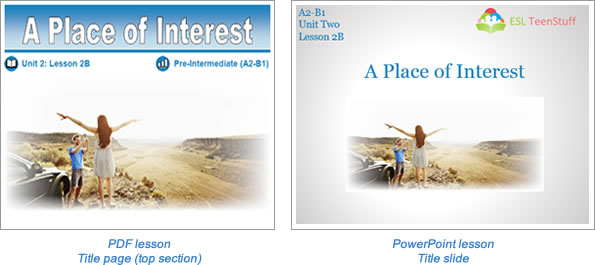
STEP 1 – Lesson A: Title and Lead in (suggested strongly)
You might use the title and/or photographs shown below to speculate about what the topic area might be for the lesson. Here, this is places/travel. You could, for example, elicit some vocabulary items from the picture or ask the students to speculate on what they think is happening in the picture.
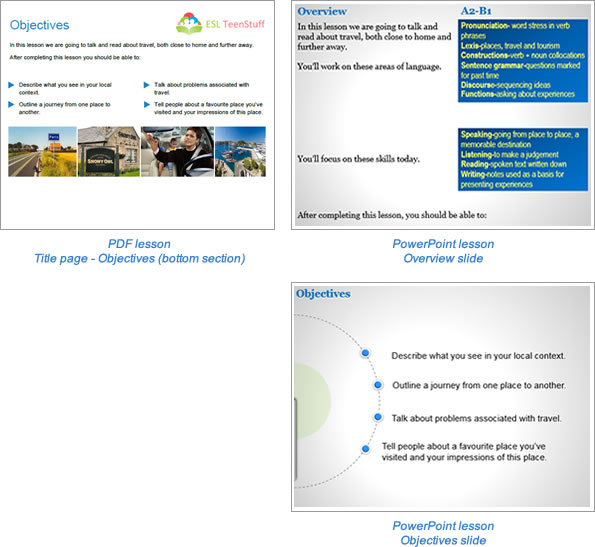
STEP 2 – Lesson A: Overview and objectives (suggested strongly)
This is an outline of what the learners should be able to do by the end of the lesson framed as ‘can do’ statements. Make sure the learners understand the content of the objectives you choose to use. At the bottom of the PDF page are a set of 4 photographs lifted from the pages of the lesson. These can be used for additional speculation as well as for eliciting key lesson vocabulary.
STEP 3 – Lesson A: Language Review (optional)
This page recycles language and issues from the previous lesson and therefore only needs be used if you are following the order that our lessons are presented in.

There are usually two or more distinct activities in Language Review sections, the idea being that you should choose what is more appropriate for you and/or use your own ideas and items you have noted from previous lessons.
STEP 4 – Lesson A: Before you start (suggested)
This page builds on the work you did at the beginning of the lesson (speculating and eliciting vocabulary on the title page) and builds towards the activities on pages that follow.
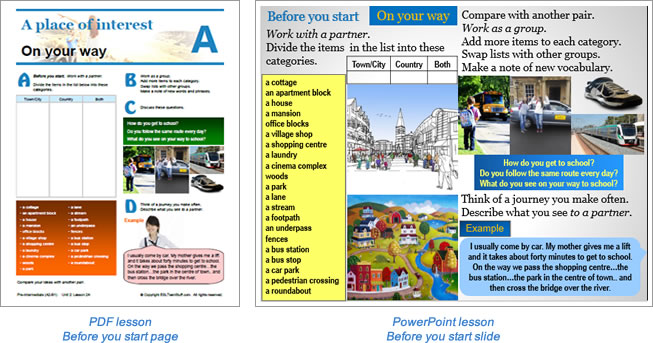
The two activities on this page are examples of shared activities, in that they involve support from other learners, i.e. pair or group work, so that learners can achieve what they could not do left to their own devices.
Looking at the first activity, learners are initially asked to work in pairs to engage with the vocabulary by putting them into categories.

Once initial explorations have been conducted, learners begin the activity proper in pairs. Learners should note their conclusions for later comparison with another pair of students.
As in many cases in the lessons, students can be asked to exchange information and pool knowledge and ideas which are then checked as a class.

STEP 5 – Lesson A: Reading: experience activity (essential)
This page contains a comment element among the additional lessons: an experience activity. These activities focus on the exchange of meaning and the goal is fluency development.

The activity evolves through the use of a written model and is supported by an optional ordering activity. Learners describe a journey at the end of the page.
The activity begins with vocabulary which might be usefully employed to extend the theme of describing a journey to other contexts.

Notice that attention has been given to presenting this not exclusively at individual word level. This is a common thread to the way vocabulary is treated at all levels and across the resources.
Following on, the model text mirrors and extends that from the previous lesson phase. Further work on sequencing is provided by the ordering of a set of photographs showing the phases of the journey described in the text.

The objective for this activity, is to make the speaking phase at the end of this section of the lesson easier for the learners, allowing them to exchange meaning without undue focus on form. The goal, that is, is fluency. Consequently, knowledge they need has been provided to help deal with the speaking challenge.

STEP 6 – Lesson A: Lesson summary and self-study suggestions (suggested)
This last page provides a summary of this lesson as well as homework / self-study suggestions. Answers are also given for exercises that require them (a common component of the lesson texts and usually found at the back).

STEP 7 – Lesson B: Reading: guided activity (essential)
The new lesson (Lesson 2B) continues on from lesson 2A. This page contains another comment element among the additional lessons: a guided activity. These activities provide a lot of support for learners since they involve the use of partly completed activities.

As an example, in the second of two reading activities, the focus is on vocabulary items embedded in a model text where learners are asked to find and order cohesive devices used for sequencing spoken text in monologue form, e.g. when, then, after that etc.
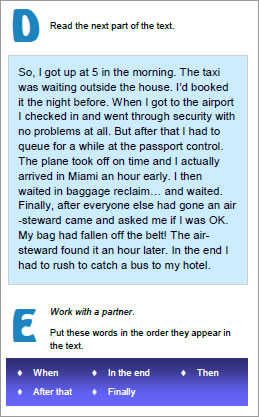
The target language is presented in the text which the learners search and the goal, i.e. to focus on the order that the target items have been used, is unlikely to result in any errors being made.
Finally, the option given here is for them to repeat an activity they did on the previous page, wherein they used notes and rehearsed telling a partner about a longer journey they have made.

STEP 8 – Lesson B: Speaking (suggested strongly)
This page provides students with the opportunity to speak about their experiences, thoughts and ideas based on the topic of the lesson.

In the case of this particular lesson, students are guided through some exercises which will help prepare them for the final speaking tasks. One of these exercises is an independent activity where students work alone to prepare their answers or ideas.
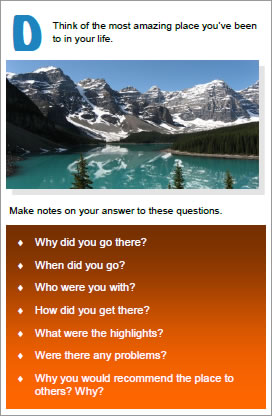
During the independent activities students have to rely on their own resources exclusively and is purely there to provide focus on the topic for the coming activity, as shown below:

Exercise E is there to provide content on which the learners can work and then make judgments in Exercise F. Exercise F is the activity proper. Students could be asked how they would like to action this. There are many possibilities; creating a short text, telling the class which destinations they have chosen or holding a class vote, among others.
STEP 9 – Lesson B: Lesson summary and self-study suggestions (suggested)
This last page provides a summary of the lesson as well as homework / self-study suggestions.

5. Supplementary materials
For our Premium Members supplementary materials are available for each lesson in the form of printable worksheets. These can be dropped into the lesson at specific point and although optional, enhance the learning experience of your students.
The supplements come in two forms:
- supplements which are tied directly to the lesson
- supplements which are extensions to the lesson
These supplements come in many different forms and provide variety to the lesson. For more information on the different forms of supplements we provide, please click here.
5.1 A supplementary material walk-through
This section illustrates how one lesson supplement, in this case Unit 2, Lesson 2A (Pre-intermediate A2-B1), might be used as support in the classroom.
- download supplement here
- download lesson here: American English version | British English version
This particular supplement is linked to a text (shown below) from that lesson.

STEP 1: Lead in
The students by this stage have worked on some useful vocabulary to describe a journey and have been asked to identify which phrases have not been used in the above text. The teacher could now ask them to hide their texts on PDF/removes the PP from view. The class could then summarise what they recall from the journey using the phrases they have just worked on. In either case, the learners will almost certainly be unable to recall the place names or pronounce them. The teacher could, therefore, offer support by writing these up on the white board (not in the order they appear in the text) and drilling them.
The students could then be asked to try to recall the sequence in which these items occur in the text.
STEP 2: Set up
The supplement can now be given out as a handout. Some discussion on the theme ‘maps’ might follow, perhaps asking them whether or not people still use paper versions of these, in which circumstances these may be useful, or whether they prefer using online maps or GPS systems. Instructions can now be given.

STEP 3: Run
Clear instructions are available on the worksheet. Students are here asked to mark places from the text on the map.
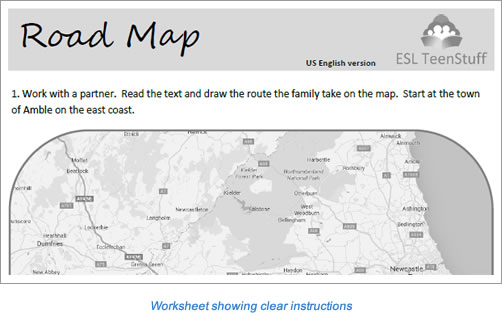
Put students into pairs. Have Student A read the text (not showing his/her partner) and Student B listen and draw the route. You can also repeat the activity by changing roles.
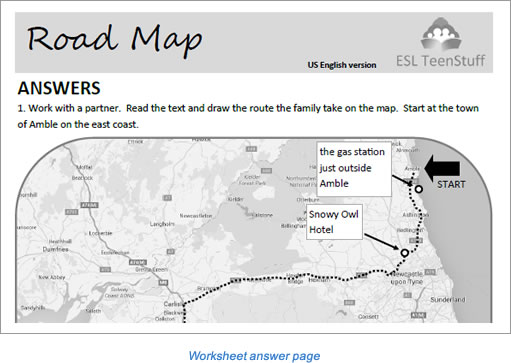
You could then refer back to the items on the board and elicit the order in which they occur in the text and then have the learners compare their routes with other pairs or as a class.
Finally, you can ask the learners to check their routes against answer page on the handout:
STEP 4: Post activity
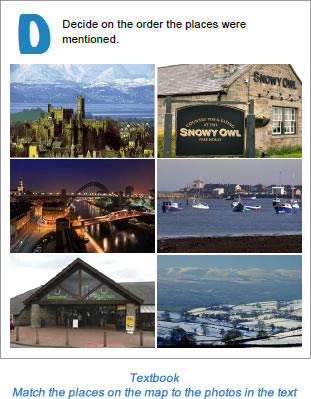
Finally return to the lesson text and ask the learners to match the places on the map with the photos found there before following the instructions to make notes on a journey they have been on and presenting this to the class. Alternatively, you might ask them to guess distances, duration of journey, speculate about what can be seen in the various places and so on.
6. Conclusion
We hope that the explanations and walk-throughs are helpful and provide a good, basic understanding of how our materials work and how they can be used in your classes.
Below are links to two files, one contains a print version of this page and the other provides more detailed explanations of our materials including the theoretical framework.
If you have any questions, please don’t hesitate to contact us.
7. Resource downloads
- How to use ESL TeenStuff (PDF): download and print the content of this page
- Nuts and Bolts: Guidelines on the use of ESL TeenStuff resources (PDF): a detailed instruction manual for using our materials including the theoretical framework and methodology that forms the basis of the materials on ESL TeenStuff.


